Programming without boolean values: To-Do App
Since I discovered functional programming, I knew I could build a To-Do app without writing my own variables. I did some tutorials and got a working app.
Since I discovered automata-based programming, I knew I could build a To-Do app without writing my own IFs or booleans. Well, theoretically. I hadn't done it before.
I started to wonder if I could actually build a To-Do app not only without variables, but also without writing any code resembling the fragments visible below.
if (isDone)
isDone ? ... : ...
value || defaultValue
showIf="model.isDone"
selected === "all"
It turns out that with Rosmaro it's possible!
In this post I'm going to present the solutions to some of the challenges I faced. To keep this post short, I'm not going to cover basics of Rosmaro. If you would like to learn more about it, please take a look at the official documentation or my other posts, like the one about react and visual automata-based programming.
The whole code of the bool-less To-Do app is on GitHub. You'll also find there a demo.
The main node - graph
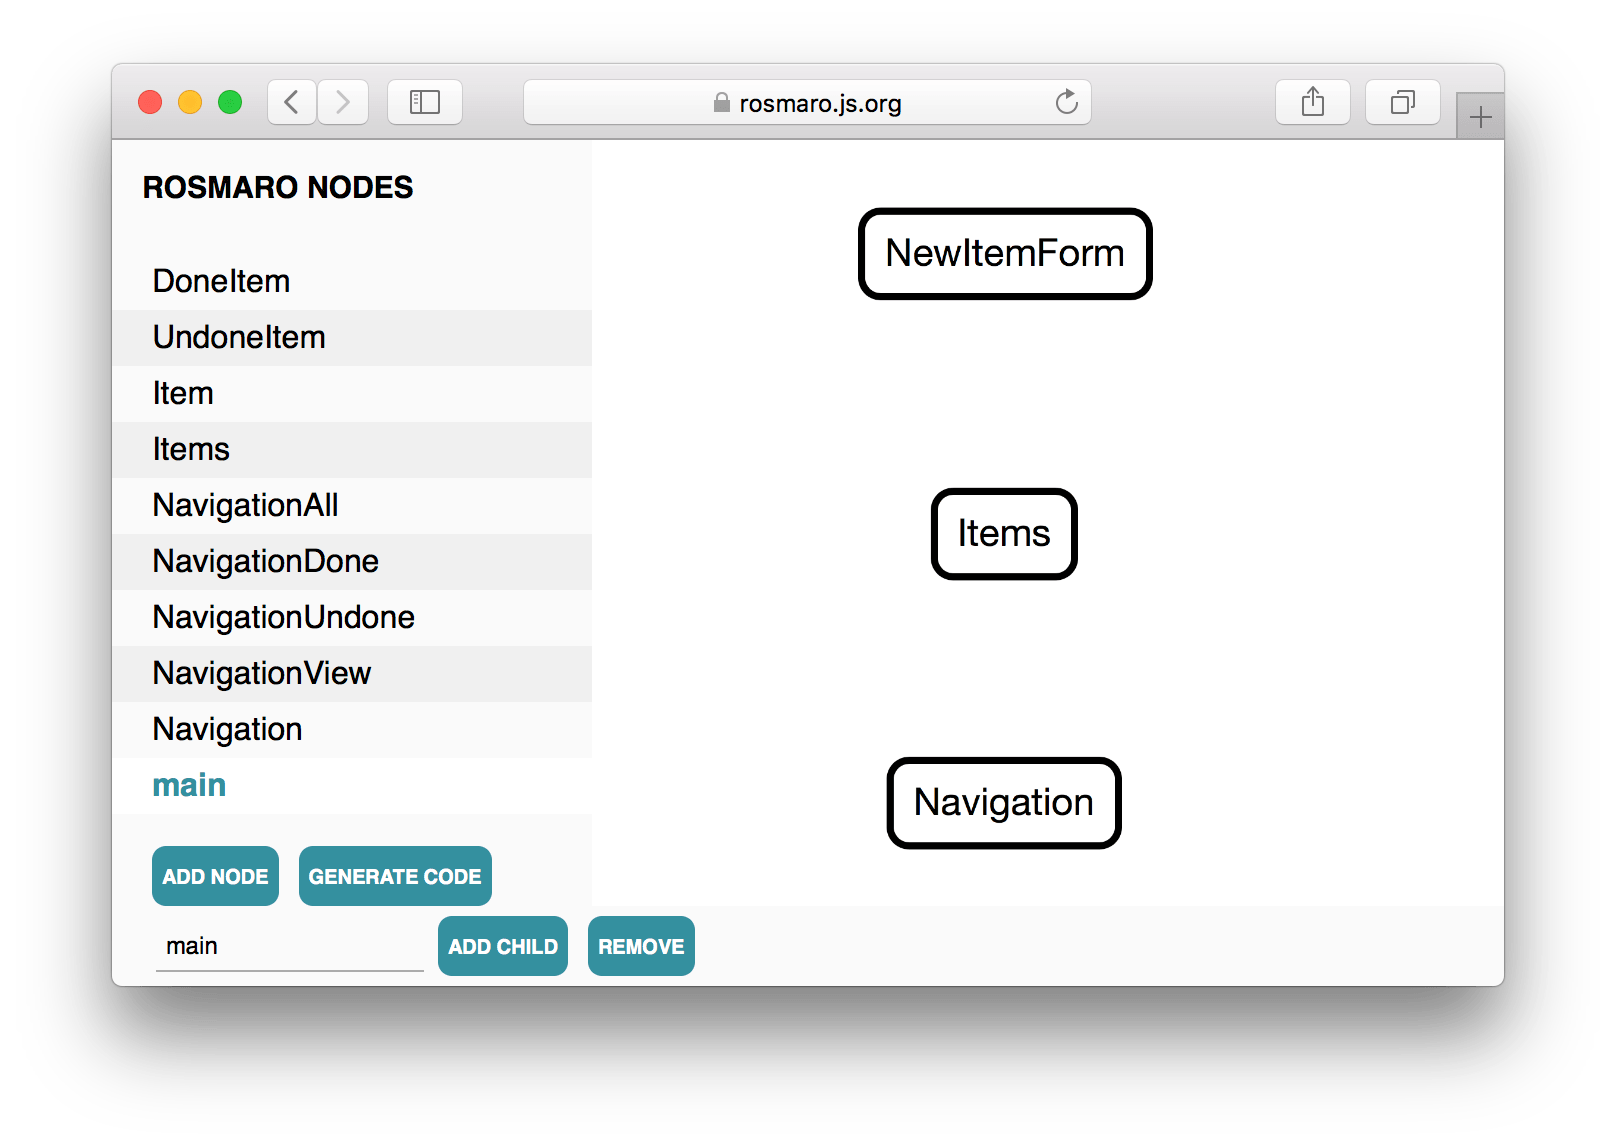
There are some things that never change. At the top of the screen, there's always the form. It's followed by the list of items to do. The navigation comes last. That's what makes a composite a perfect candidate for the main node. It reflects the intended behavior - few simultaneously working areas which never change from one to another.
We'll come back to the code handling the main node at the end, because it's necessary to know how do Items and Navigation render.
The form - graph and code
 The form is simple. It doesn't differ from the one described in the react and visual automata-based programming post.
It's built using two nodes:
- a graph called NewItemForm
- a leaf called NewItemFormView
The NewItemForm graph exists only to handle loops from NewItemFormView back to NewItemFormView. It makes it possible to update the context when the user types the content of a new item or adds a new item.
Here's the code of the view:
const NewItemFormView = {
  type: ({ctx, newItemText}) => ({
    arrow: 'typed',
    ctx: {...ctx, newItemText}
  }),
  addItem: ({ctx}) => ({
    arrow: 'item added',
    ctx: {
      ...ctx,
      newItemText: '',
      items: [...ctx.items, ctx.newItemText]
    }
  }),
  render: ({ctx, thisModel}) =>
    <form>
      <input
        type="text"
        className="item-form-field"
        value={ctx.newItemText}
        onChange={e => thisModel.type({newItemText: e.target.value})}
        />
      <input
        type="button"
        className="item-form-button"
        value="Add"
        onClick={() => thisModel.addItem()}
        />
    </form>
};
As we can see, this handler works with a context shaped like this:
{
  newItemText: 'what is the user typing',
  items: ['the first thing to do', 'the second thing to do']
}
What's very important to notice is that new items are always added at the end of the array. That way the index of an item never changes. If it was added at the third position, it stays at the third position. I promise you that soon it will become clear why does it matter.
How does the navigation work without booleans?
There are no IFs. There are no filters. How does it work then?
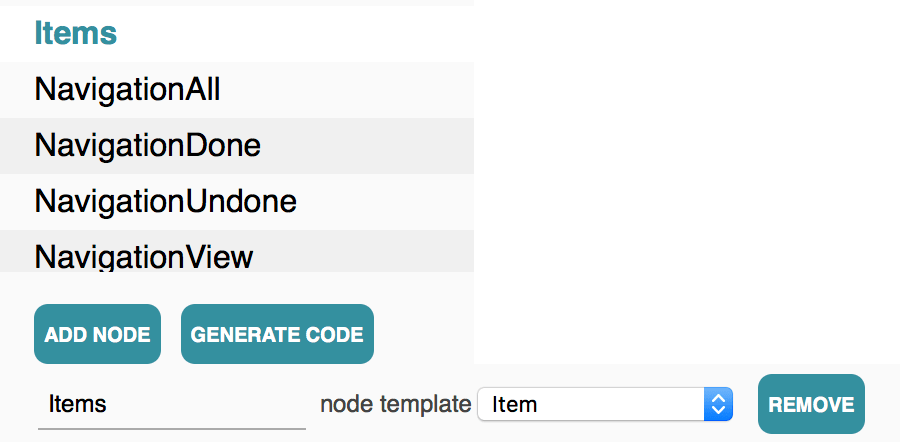
It involves three nodes:
- Navigation
- Items
- main
When Items are rendered, they produce an array like this:
[
  {
    all: somehowRenderedItem,
    done: somehowRenderedItem,
    undone: somehowRenderedItem,
  },
  {
    all: somehowRenderedItem,
    done: somehowRenderedItem,
    undone: somehowRenderedItem,
  },
  //...
]
Each element of this array corresponds to one item to do.
Keys all, done, and undone correspond to filter settings. Values are views. When the current navigation settings indicate that the user wants to see just undone items, the proper way to display the list of items is to display the values stored under undone keys. Some values will be fully rendered views, and some will be nulls (so they simply won't show).
But how do we know which key should be displayed?
When the Navigation is rendered, it doesn't return just the view. It returns a structure shaped like this:
{UI, show}Under the UI key, there's the view. The value under the show key is a map function.
show([
  {
    all: somehowRenderedItem,
    done: somehowRenderedItem,
    undone: somehowRenderedItem,
  },
  {
    all: somehowRenderedItem,
    done: somehowRenderedItem,
    undone: somehowRenderedItem,
  }
]) // => [somehowRenderedItem, somehowRenderedItem]
The common ancestor of Items and Navigation, that is the main node, passes the result of the Items' render function to the show function returned by the Navigation node.
const main = {
  initCtx: {newItemText: '', items: []},
  afterRender: ({res}) =>
    <div className="container">
      {res.NewItemForm}
      <ul className="todos">
        // Here the *show* function picks proper views.
        {res.Navigation.show(res.Items)}
      </ul>
      {res.Navigation.UI}
    </div>
};
How do navigation buttons change?
The navigation may be in one of the following states:
- showing all items
- showing only done items
- showing only undone items
They all may be the children of one graph. The only problematic thing are the transitions. Each node must be connected with every other node. In order to limit the number of required arrows, I used custom entry points and loops.
This is what does the Navigation node look like:
 And here's the view:
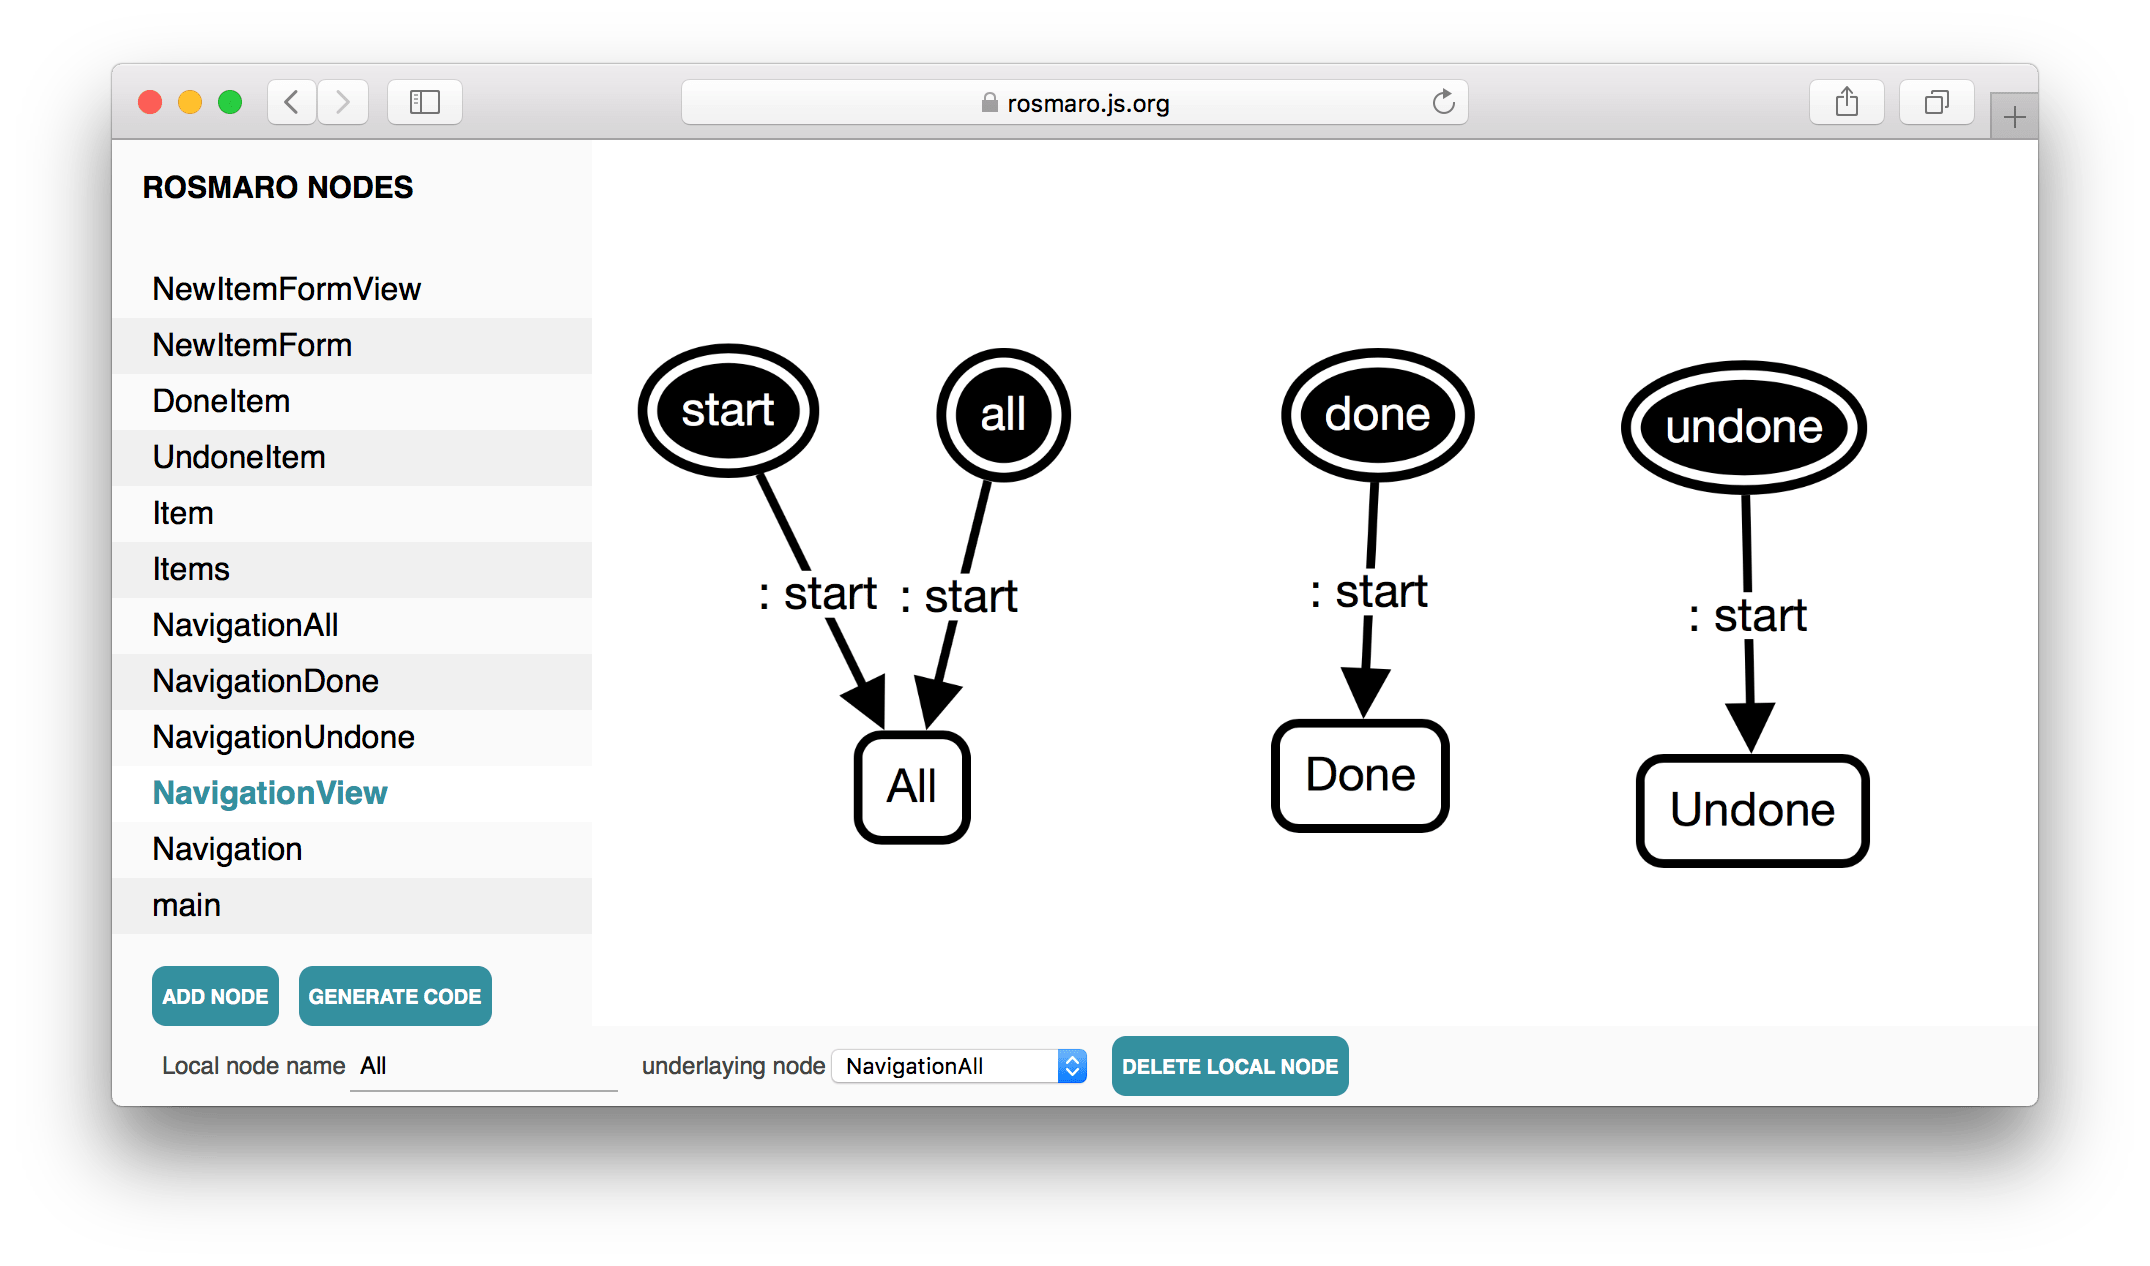
Every time the user clicks the Undone button, it makes the current node of the view (either All, Done or Undone) follow the navigating to undone arrow.
Because there's no such arrow within the NavigationView graph, it makes the Navigation's View local node follow this arrow. It's similar to event bubbling.
When the View node follows the arrow called navigating to undone, it makes a loop entering through the undone entry point.
When the View graph is entered through the undone entry point, the Undone child becomes the active node.
That way we can avoid transition explosion when we're adding another navigation state. It will always require no more than 2 arrows.
Each handler is coded like that:
const NavigationUndone = {
  ...navigationHandlers,
  render: ({thisModel}) => ({
    // How does it *look*.
    UI: <div>
      {inactiveButton({thisModel, text: 'All', method: 'navigateToAll'})}
      {inactiveButton({thisModel, text: 'Done', method: 'navigateToDone'})}
      {activeButton({text: 'Undone'})}
    </div>,
    // This is the map function described above. It's built using Ramda.
    show: map(prop('undone'))
  })
};
Is this done? The graph will tell!
There's no boolean value indicating whether an item is done. Instead, it's expressed by a drawn graph.
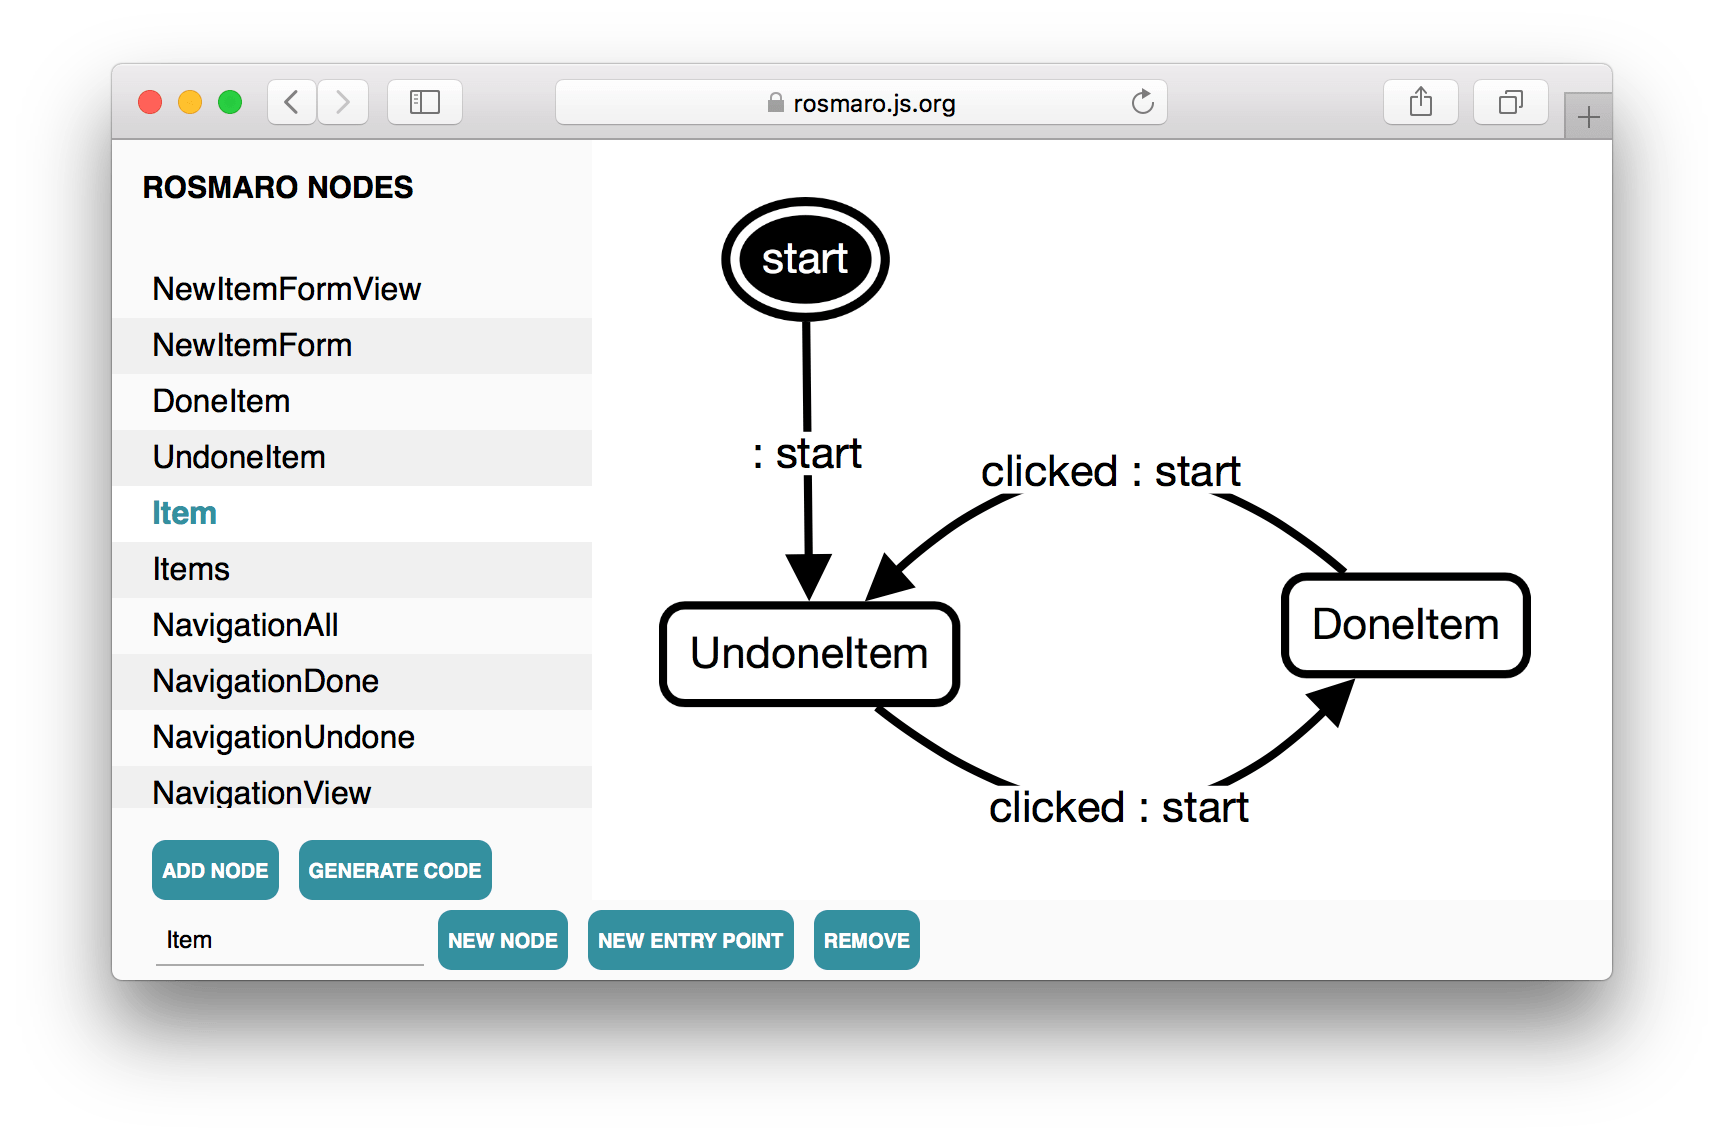 We can clearly see that a new item is not done. Clicking it marks it as done. Clicking it again marks it as undone.
Handlers of the leaves make use of a feature which hasn't been mentioned yet - calling methods of a single node instead of the whole model.
const UndoneItem = {
  render: ({ctx: {title, id}, thisModelNode}) => {
    const view = <li className="undone" onClick={() => thisModelNode.clickItem()} key={id}>
      {title}
    </li>;
    return {
      all: view,
      done: null,
      undone: view,
    };
  },
  clickItem: () => ({'arrow': 'clicked'})
};
By using thisModelNode instead of thisModel we make sure that clicking an item calls the clickItem method of this very item and not its siblings.
Here we can also see that when the navigation asks for done items, an undone item doesn't render (it returns null instead of its view).
How is the list of items created?
We saw above that a single item is a graph. It also expects a context like this:
{title, id}But there may be many items to do, not just one. And the context of the whole model doesn't look like this.
How does it work? It makes use of dynamic composites and context lenses. You can find more information about dynamic composites in the documentation of Rosmaro.
The Items node is a dynamic composite which uses the Item graph as a template.
The handler of Items provides a function of the context which returns the list of its children. In this case, they are named after indexes of the array which stores all the items to do. For the purposes of this simple To-Do app, those indexes serve as unique identifiers of the items. That's why it's so important to always add new items at the end of the array - otherwise their identifiers would change.
const Items = {
  nodes: ({ctx}) => keys(ctx.items),
  afterRender: ({res}) => reverse(values(res))
};
Because we want see the recent items at the top of the list, we reverse the result of rendering all the items.
OK, so that's how the list is created. But what about the context? It's shaped by a lens attached to the handler of the Item graph.
const Item = {
  ctxLens: ({localNodeName}) => lens(
    (ctx) => ({
      id: localNodeName,
      title: ctx.items[localNodeName]
    }),
    ({title}, ctx) => ({
      ...ctx,
      items: update(parseInt(localNodeName, 10), title, ctx.items)
    })
  )
};
Under the ctxLens key there's a factory function of a Ramda lens. The factory takes the local name of the node. In this case is an index of an item. We know this, because that's what does the nodes function of the Items node handler do.
Because Item nodes only read the context and never cause transitions which could update it, the only part of the lens which really matters is the one which zooms the context in. It's this one:
(ctx) => ({
  id: localNodeName,
  title: ctx.items[localNodeName]
})
So when the localNodeName equals "1" and the context looks like this:
{
  items: ['first', 'second', 'third']
}
The Item node is going to see context like this:
{
  id: "1", // because node names are always strings based on array indexes starting at 0
  title: "second"
}
Conclusion
In many situations boolean values are not the only way to program conditional logic. With visual automata-based programming it's possible to replace them with drawings of boxes connected with arrows and boolean-free code.
Thank you for reading this!